This is some basic information about the Aperture setting in your camera, and how to use it effectively.
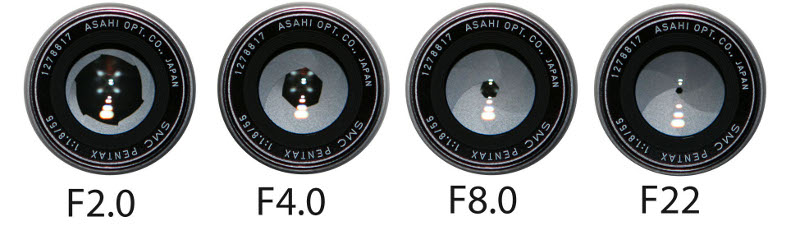
The Aperture Size determines how much light enters your lens. The size is controlled by an iris, like the human eye. Aperture sizes are measured in F-Stops; the higher the F-Stop number, the smaller the opening. Here are some examples of F-Stop settings in a Pentax lens:
Most photographers in our club use Aperture Priority mode. That's where you pick the aperture size, and the camera decides the exposure time (shutter speed). The main reason for using Aperture Priority is to control the Depth of Field, which is usually the most important creative element of an image.
Here are two examples of the same scene shot with two very different Aperture settings, to show the difference that Depth of Field can make. As you can see, a larger Aperture results in a shorter Depth of Field, and vice versa.
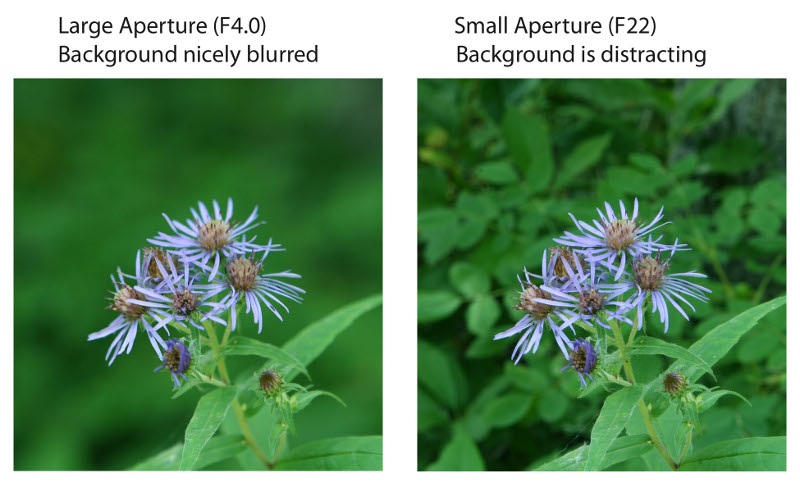
In the above situation, the larger aperture (left image) is better because it blurs the background vegetation, which is a distraction from the main subject. Using Aperture Priority allows you to directly control how much of the background is in focus (Depth of Field). You won't have this type of control if you're using Shutter Priority or Automatic mode.
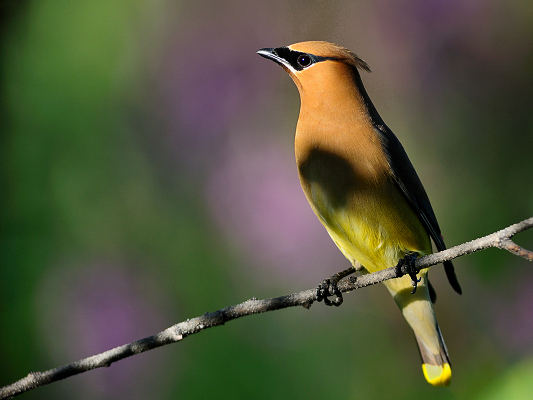
This image by Bob Steventon, which scored very highly in a Lions Gate competition, uses a relatively large aperture (f5.6) to focus attention on the bird while providing a nicely blurred background that does not distract from the main subject. Note that the aperture is just large enough so that the entire bird is in focus. If Bob had used a larger aperture, some parts of the bird might have been out of focus, and therefore the image would have received a lower score in the competition.
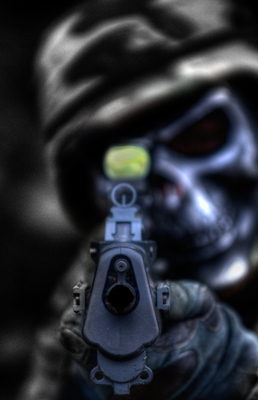
This image by Doug Lamb, which was a Photo of the Month winner, uses a large aperture (f2.8) to focus very narrowly on the muzzle of the gun, which makes the image more menacing. Also the shooter's mask seems more menacing because it is blurry. If the mask were in focus, you'd probably be able to tell it was a mask, and therefore the image would be less menacing.
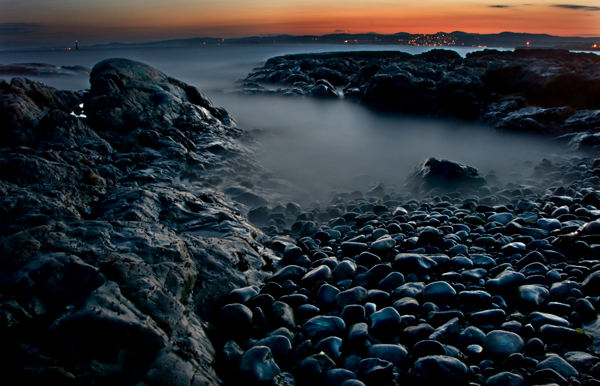
This image by Richard Bruce, which scored very highly in a CAPA Richmond Print Competition, uses a small aperture (f18) to achieve a very broad focal range that includes the pebbles in the foreground as well as the sunrise or sunset in the background. It's fairly common to use small apertures in landscape photography when you have interesting details in both the foreground and background, e.g. a field of alpine flowers in the foreground, with mountains in the background.

This image by of Christmas tree lights by Mike Kohut uses a small aperture (f22) to achieve a twinkling effect in the lights. This effect is due to diffraction of light passing through a small opening. The eight points that you see on each light are due to the eight-sided shape of the aperture in this particular lens. While diffraction can sometimes have a pleasing effect, you should be aware that sometimes it will be an undesired effect.

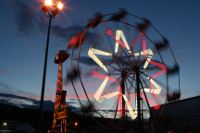
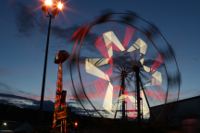
The above examples of a ferris wheel (taken by Mike Kohut at the PGX) show the trade-off between aperture and shutter speed. As you reduce the aperture size, you need a longer exposure time (i.e. slower shutter speed). You need to take this trade-off into consideration, especially when photographing anything in motion. Do you want to freeze the action, or do you want to blur the movement for creative effect? And are you able use a tripod when long exposure times are desired?
It should be noted that digital photographers can use ISO as a third variable when balancing aperture vs. shutter speed. A discussion of ISO is not in the scope of this article, however we will mention that ISO should generally be set as low as possible (typically ISO 100) to minimize the amount of digital noise.
A final thought - Do experiment with different apertures if you have time. However, if you're in a situation where you need to take a picture in a hurry, and you don't have time to play around with aperture settings, then your best bet is to use a medium size aperture, which usually works for most applications. There's an old saying in our club - "F8 and be there".